If you use Lightsail you know it offers different pricing and scale models. For a start you choose a smaller and cheaper version but now business is good and you need to upgrade how do you do that ? In this tutorial i will share with you step by step approach on how to upgrade your Lightsail instance, or even change the availability zone.
Steps could be listed as follows:
- Take a snapshot of the Instance.
- Create new instance from the created snapshot.
Yes, this is really easy, if you are just looking for hint that is enough, but if you’re new to Lightsail or looking for a step by step tutorial with screenshots, read on.
Creating Server Instance on Lightsail
To create a new instance you get option right after login and when you reach the home page.
Click on Create instance button to get started and create an instance. like shown in image below
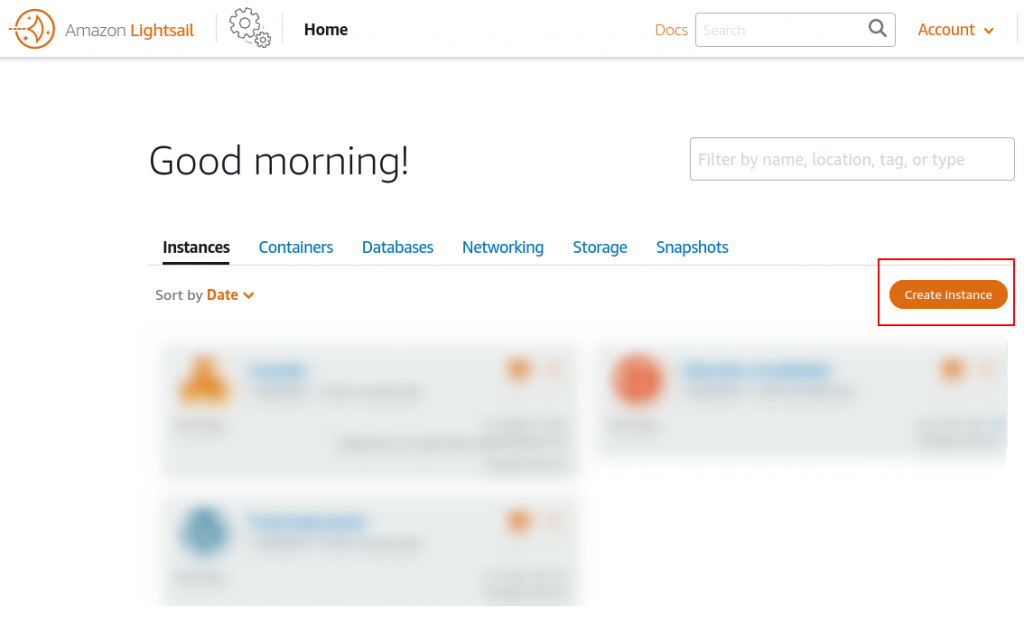
You will be taken to the page where you can customize the instance properties, like which zone you want to choose, what platform to be used and if you want a ready to use application. Whole list of services are available.
Choosing Instance Location/ Availability Zone
First option available while creating an instance is to choose a location for your server. This is important because it will effect the price as well as latency of the service. For example if you are in USA but your website or project targets Japanese people its better to take a Tokyo based instance rather than USA. It might seem like for you it is bit slow but for your customer latency will be comparatively low.
Prices of the Instances may also differ from location to location. So based on your priority on cost vs latency you can make a choice. Following are all available locations offered by Lightsail:
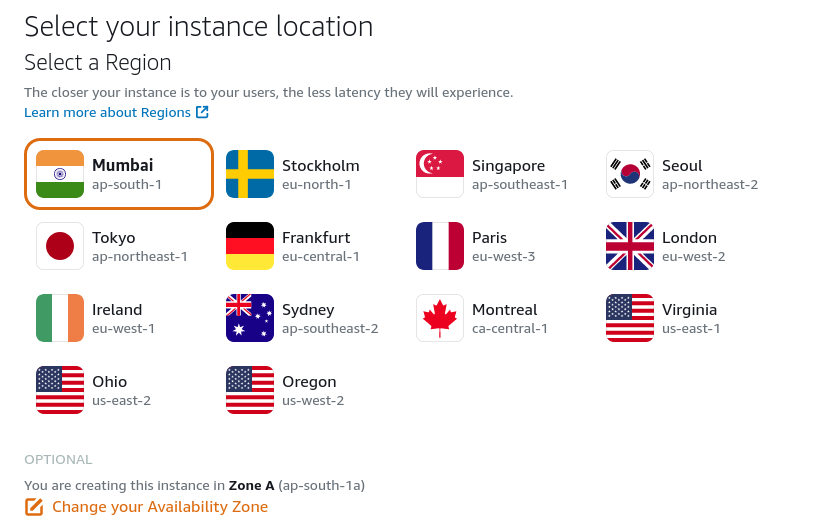
For most of my projects I am using Mumbai Instance as i am using them for development purposes or internal usage so it is faster for me. Further there are availability zones also but as you can see this setting is optional and default usually works fine.
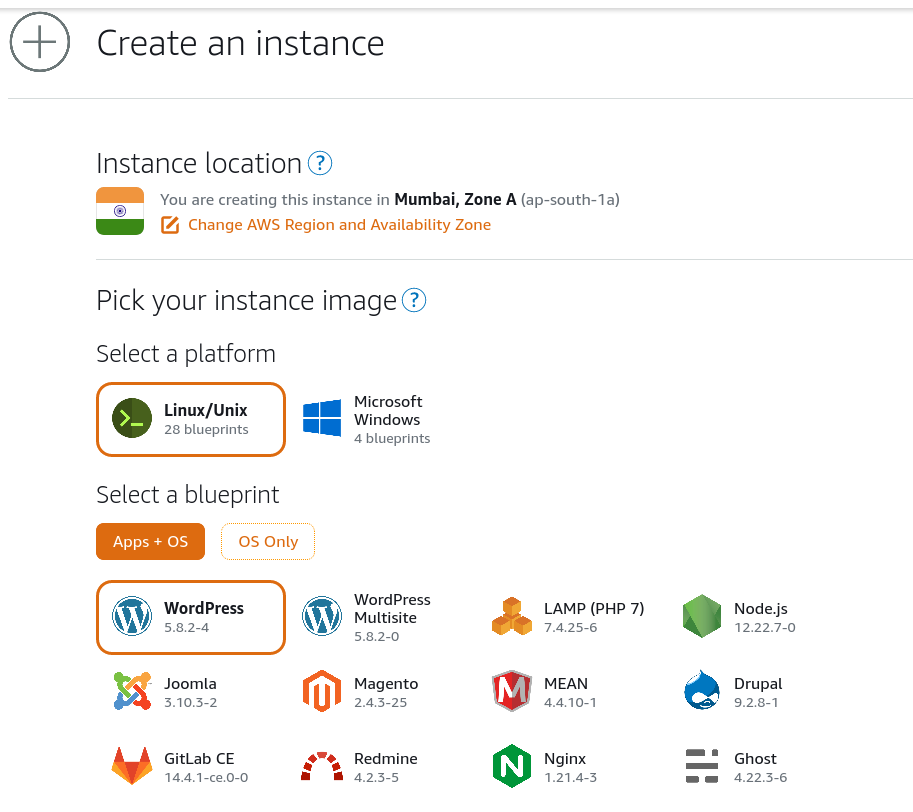
Choosing Instance OS and Application
Once you are through with choosing the location of the server its time to look out for Operating system. My personal preference is always the Linux OS that too, Ubuntu. However depending your your deployment needs you may need to choose from Windows OS as well.
At the time of writing of this post, following instances of OS are available to choose from:
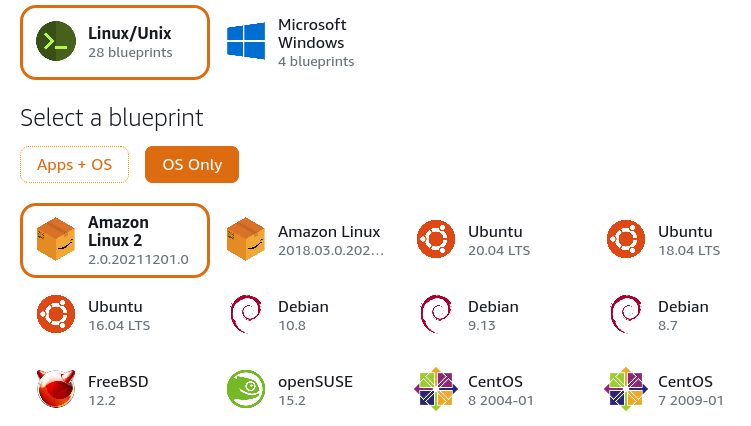
As you can see there are multiple options to choose from. My personal favorite is Ubuntu and I like to use LTS version as they are more stable and secure and as you can see Lightsail offers LTS versions only, so always choose to go with latest one.
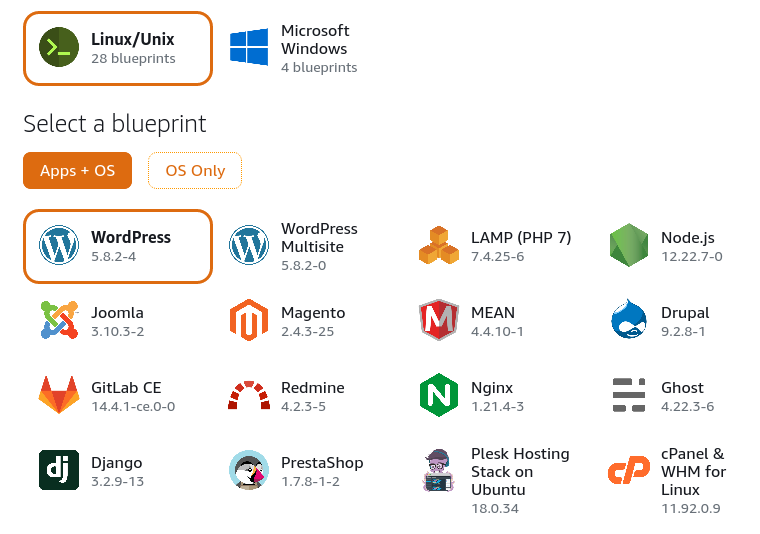
If you want to install a default tech stack or application simply by creating the instance you can simply do so by choosing Apps+OS option. Here you get whole list of applications which you can get started with just a click. All kind of deployment stacks are available at your service. Available apps at the time of writing of this post are shown below:
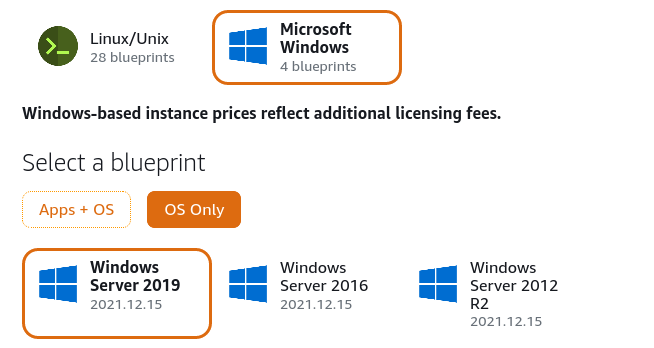
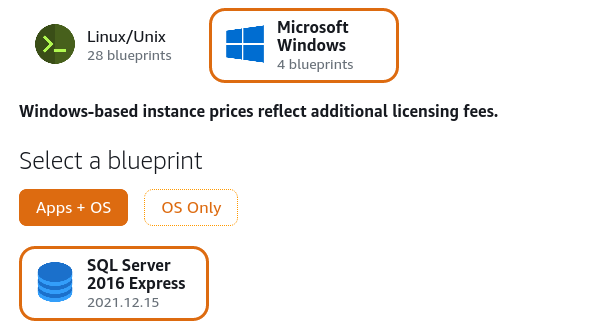
If you are looking to deploy Windows application the options are limited here. However you can definitely explore EC2 for more available choices as Lightsail is created for quick and easy deployments. There are 3 available options for windows and if you are looking for SQL Server(which is only default Apps+OS option) then you can choose `Apps+OS` option.
There are few more options available however if you are not a server expert, it will not bother you anyways. Leave them be and move on to next section.
However there is one option for automatic snapshots, this is more or less like taking automatic backups of your instance, so you can consider checking this checkbox, or you can do it later like I will explain in second section of this post.
Choosing the Pricing Plan and Performance Configuration
Pricing Matters, if you are just starting with lightsail or with web hosting pricing will matter. Every business have different needs, thus Lightsail also gives you multiple pricing model and accordingly performance.
My Suggestion will be to choose the option based on performance requirement rather than pricing, for example if you wish you host a simple CMS website which is not required to take much load its okay to go with cheapest plan available. While if you are wishing to host a more complex application which may need to perform well and may need more storage space consider going for multiple CPUs, higher RAM allocation and more Storage capacity thus of course cost will increase as well.
Lightsail offers 5 plans based on Price, CPUs, Memory, Storage and Data Transfer limit. Explore and choose what you think will be suitable for your app hosting requirement.
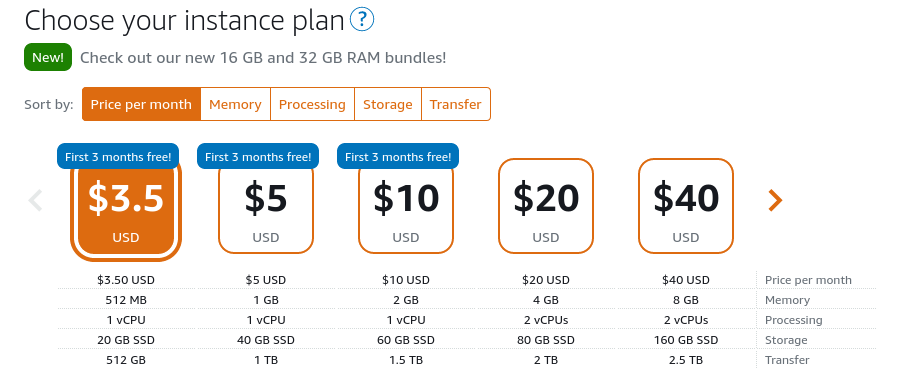
For demonstration purpose I have choosen OS only with Ubuntu 20.04 LTS and cheapest price. In Next section I’ll show you how you can upgrade any of these parameters without loosing any of your data or configuration.
Create and Connect with Instance
Finally just give your instance a name make sure this is unique and logical to identify the purpose of this instance.
NOTE: Please don’t assign the domain name as the name of instance as it may cause issues while creating DNS Zone because of same name.
You can always choose to create multiple instance at the same time by choosing the number in front of the name. Once done just click on Create instance button and wait for your instance to be ready.
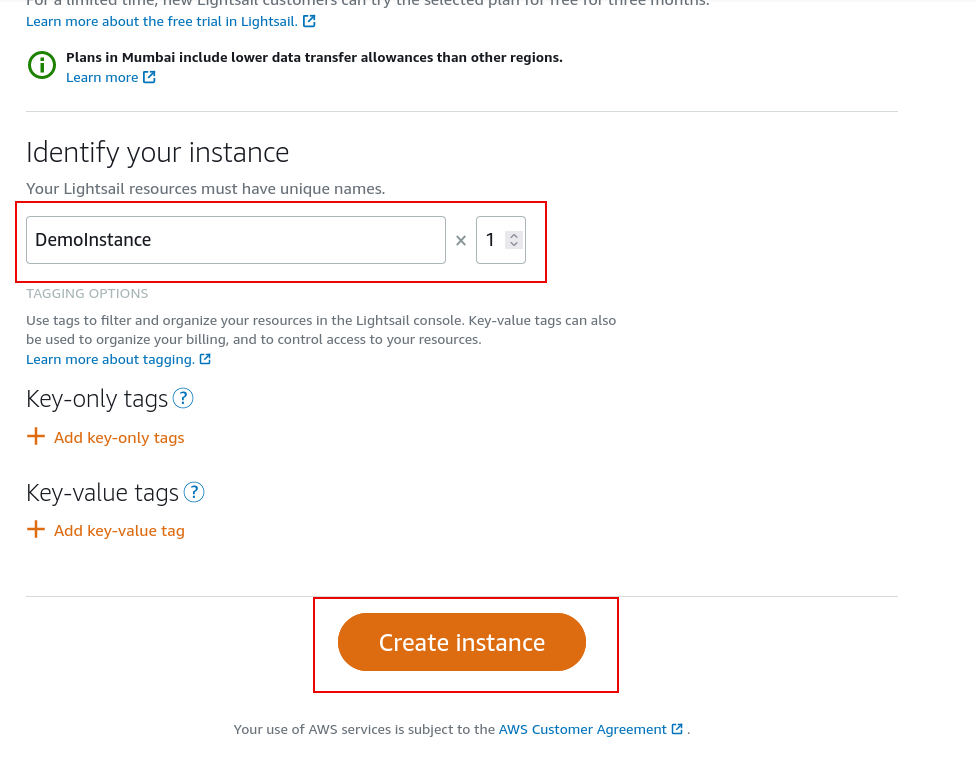
The Tag option you see is just for better organizing and identifying instances when you have many instances running there.
If you want to know about How to map your domain to Lightsail please read: How to use Route53 to host domain on Lightsail And How to use DNS Zone on Lightsail to host Single or Multiple Domains.
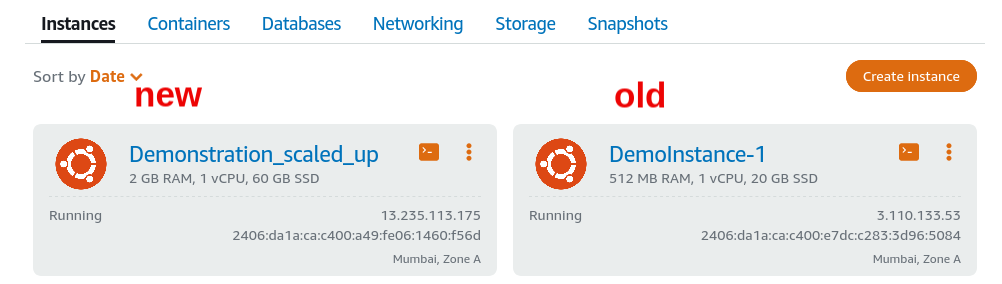
When your instance is ready it’ll display on the home page. It may take some time for it to be in running mode.
Once it is in running mode you can connect to your instance via command terminal using browser based terminal by clicking on terminal icon.
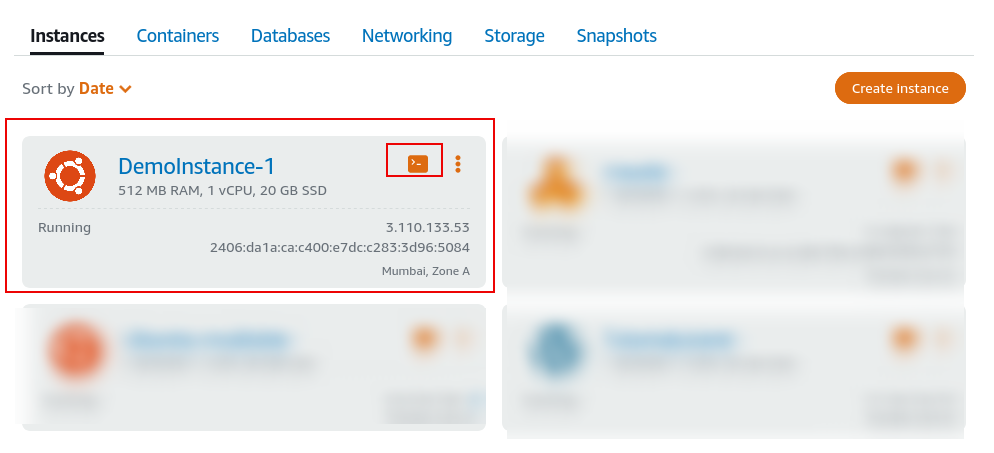
This opens a command terminal which you can use for configuration and deployment of the applications.
Now it is the time to come to the Main part of this tutorial, what if you want to increase the size of the storage or choose more Memory or Processing power, in short moving to a bigger plan and providing more power to your application.
Upgrading or Downgrading Lightsail Server Instance
Yes, it is possible to downgrade as well. However mostly I find people looking to upgrade only. Anyways, Let’s move on and I’ll show you how to do that. It is really easy.
Step 1: Create a Snapshot of your instance
Click on the Instance name and your will be redirected to the Instance detail page. It will look like this:
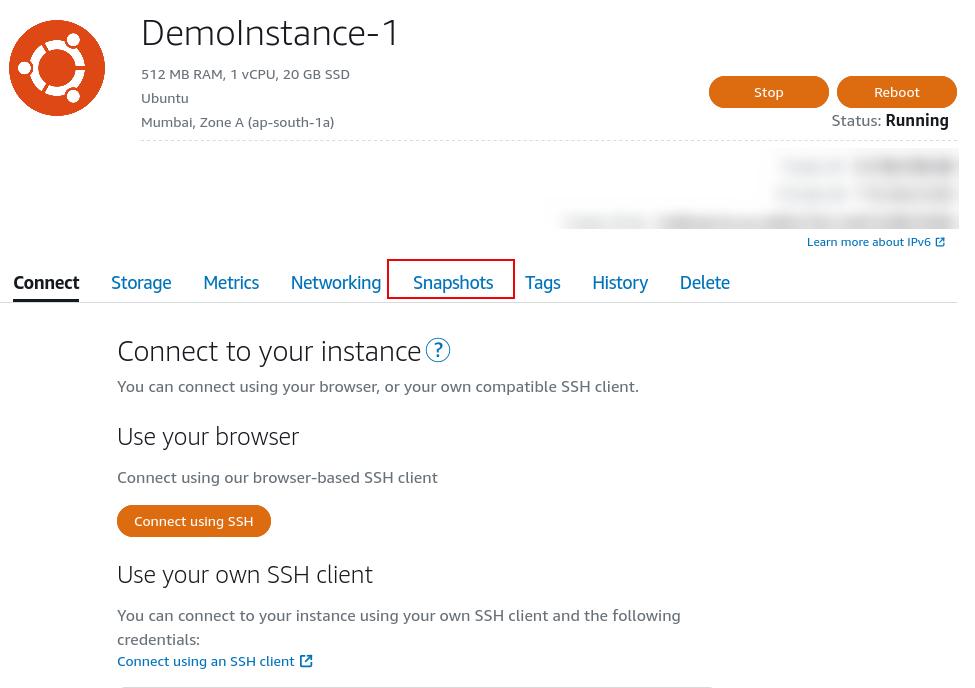
Next click on Snapshots in the tabs and move to Snapshots menu.
Click on the “Create Snapshot” and a form field will be presented in front of you. Put the name of your snapshot, make sure you are able to identify it easily, i usually write the configurations of the instance along with the name and date so i can easily identify when and with what configuration it was created.
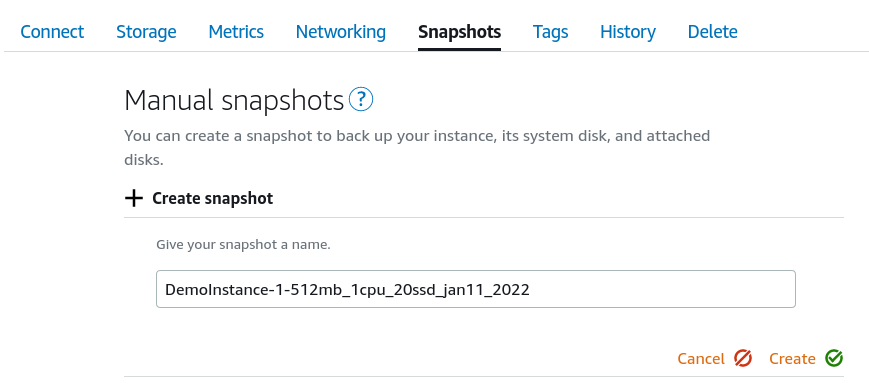
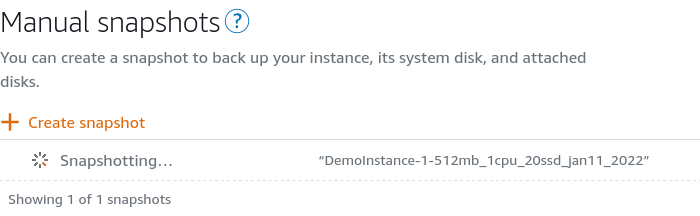
And then click on “Create” button. It will take some time as it has to capture the whole OS and whatever app or configuration you did on it. So sit back and relax.
Step 2: Create New Instance from Snapshot with New configuration
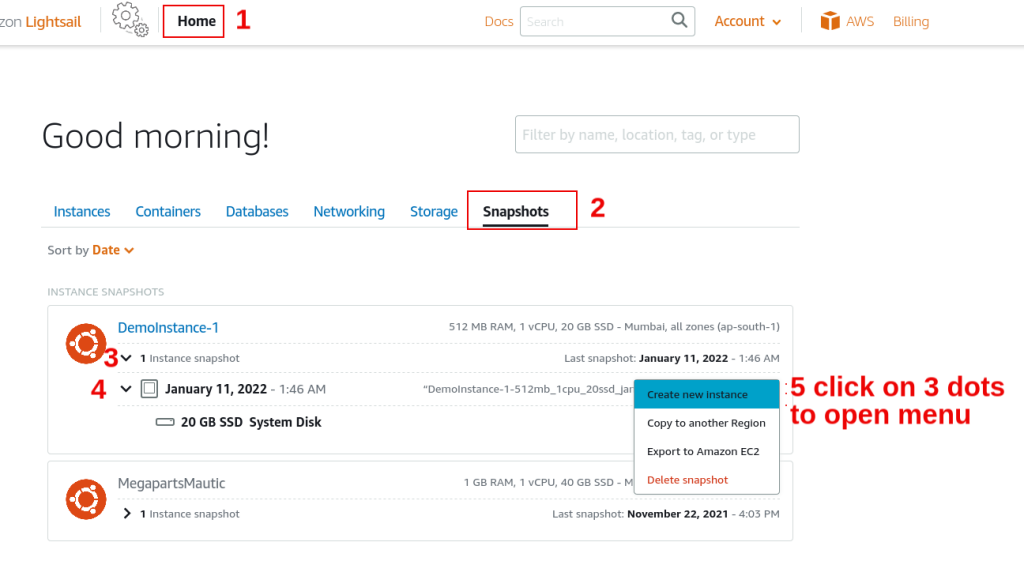
- Click on “Home” menu at top to go back to home of lightsail.
- Click on “Snapshots” menu tab to navigate and view all available snapshots.
- Expand the arrow to see the snapshot instance.
- Expand the date to see all details of this snapshot.
- Click on 3 dots on the right side to open menu and see options.
The available Options from menu dropdown opened are described as follows:
Create new Instance
If you simply want to create a new instance you should just choose the first one. This will allow you to choose different pricing and performance plans but will not allow you to change the region of your instance.
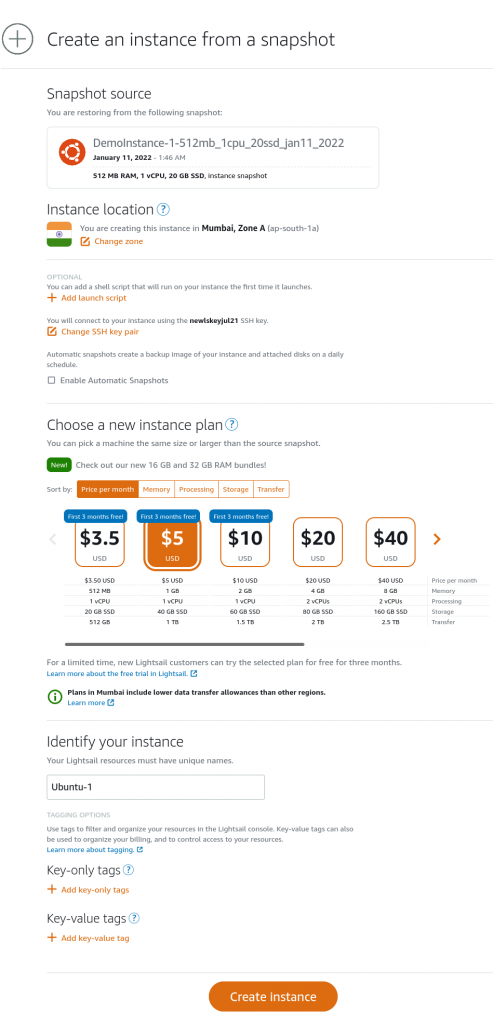
Choose a new plan which suites your new requirements and give it a new name and simply click “Create instance” button.
This will not effect your existing Instance. Until you stop and delete the existing instance it’ll still continue to run, Once you are done with new instance, you can go to Networking > DNS Zone and point your domain to new instance or if your are using Static IP you can detach it from old one and attach to new instance.
Copy to Another Region
If you are copying your instance to another region it will let you do so but it will not immediately allow you to resize or scale the instance.
However, that part is again very easy, once the copy is complete and instance is there, you can repeat the snapshot process and then scale the instance from snapshot(in the same region).
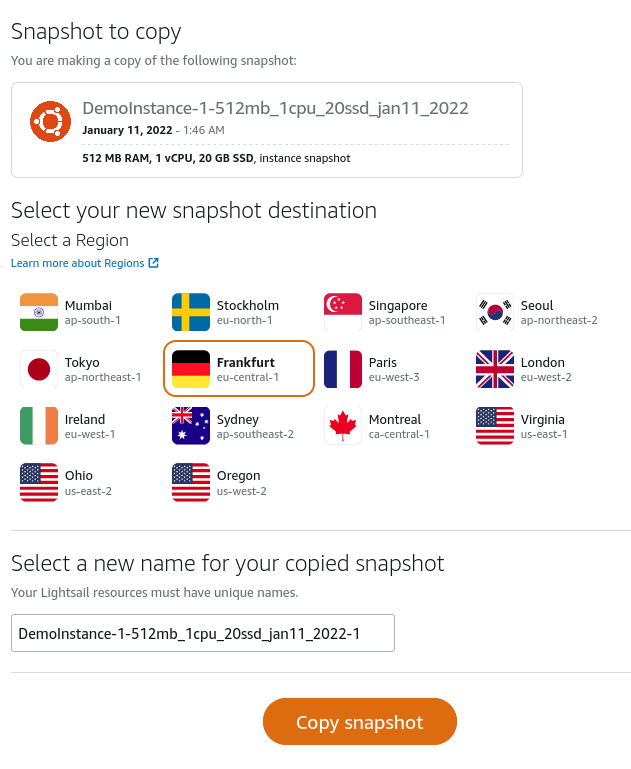
NOTE: Please note that while the DNS Zones are global entities but Static IP is not, so if you move to different region you will need to create another static IP and attach to your instance.
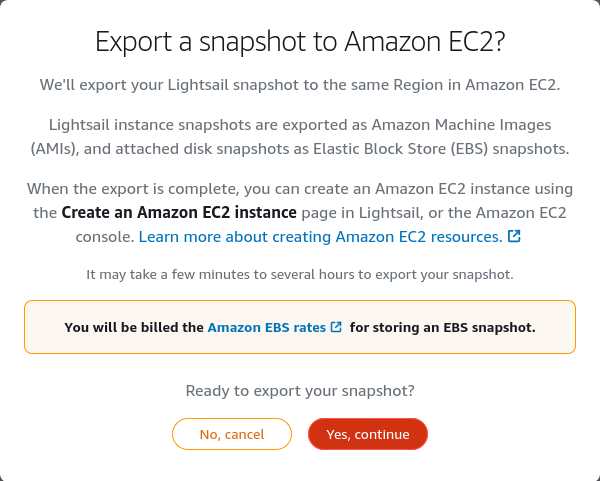
Move to EC2
This section may take a post of its own so I am not covering this in current post. The basic idea is to export the instance to EC2 and then create a new EC2 instance there using the snapshot.
With a hope that it will help someone looking for solution, I will end this tutorial here. If you have any question or query please feel free to comment or contact me using Contact page.
Pingback: get androxal new york city
Pingback: enclomiphene online order canada
Pingback: order rifaximin generic lowest price
Pingback: xifaxan no prescription cod
Pingback: ordering staxyn generic from the uk
Pingback: how to order avodart cheap uk
Pingback: cheap dutasteride australia over the counter
Pingback: cheapest buy flexeril cyclobenzaprine generic uk buy
Pingback: buy gabapentin no rx needed
Pingback: buying fildena ireland over the counter
Pingback: how to buy itraconazole price generic
Pingback: kamagra levné krmení z dodávky
Pingback: sans ordonnance kamagra pharmacie en spain
Pingback: lamotrigine 25 mg
Pingback: bph cialis dosage
Pingback: cenforce 100 effects
Pingback: tadalafil for workout
Pingback: can anyone take semaglutide for weight loss
Pingback: tirzepatide vs semaglutide bodybuilding reddit
Pingback: semaglutide bijwerkingen lange termijn
Pingback: sildenafil 50mg dosage
Pingback: minoxidil foam review
Pingback: ivermectin treatment reference
Pingback: minoxidil foam vs liquid drying time
Pingback: sildenafil risk groups
Pingback: avanafil contraindication profile
Pingback: PDE5 suppression pathway
Pingback: vardenafil onset time
Pingback: online safety fraud prevention