
This tutorial is all about configuring a godaddy domain to Amazon AWS Route 53, which is domain manager and DNS service for AWS services. we will proceed a step by step approach which can help beginners as well as others to host godaddy domain on route 53.
If you’re doing this for the first time, I am sure you will be able to follow through these 10 simple steps to point godaddy domain to route 53:
- Sign in to AWS Console.
- Go to Route 53 section.
- Go to Hosted Zone and Create Hosted Zone.
- Add your domain name for public hosted zone.
- Save to obtain name servers.
- Go to your Godaddy Account and Product Manager.
- Click on DNS option for the domain you want to point.
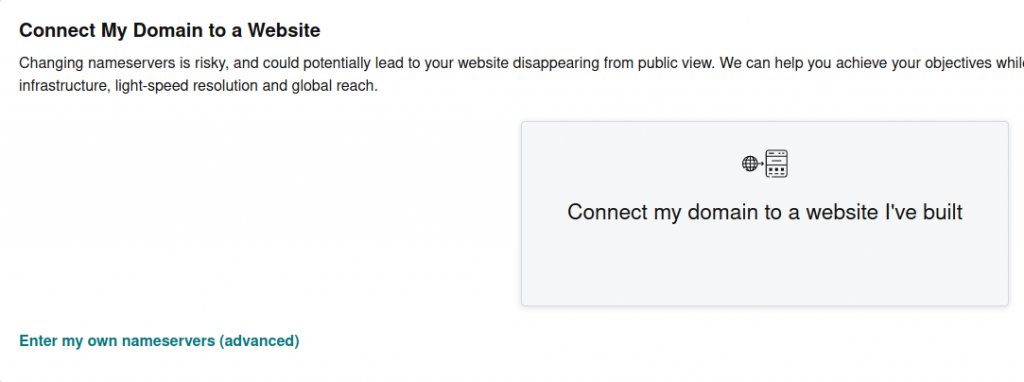
- Click on Change Nameserver, and “Enter my own Nameserver”.
- Copy the nameservers from route 53 to the given fields and Save.
- it may take some time but you are ready to use this domain in any of the aws service by creating “A” record in your route 53 hosted zone.
Okay, so you have brought a domain from Godaddy and now you want to point and host this domain on aws route 53 which is Amazon’s official DNS resolver. You should understand few terms before moving on, I’ll try to keep it as simple as possible.
What is DNS, Nameserver and Hosted Zone ?
DNS: DNS is an acronym for Domain Name System, which means it is a system which helps you write a domain in browser and helps browser knows where to look for the resource you are looking for.
Nameserver: NS or Nameserver is the component of DNS which is at the server end. That means when you enter domain name in browser it looks for nameserver URI which tells the system where is the server located which further helps to locate IP address of the server. so to say Nameserver is Server part of DNS client-server mechanism.
Hosted Zone: As per AWS console’s definition, a Hosted Zone is like a container with information about where to route a query coming to a domain.
Based on the steps defined above we are proceeding in orderly manner: Step 1-5 are on AWS while Step 6-10 are on Godaddy. Majorly we define these as follows:
- Create a Hosted Zone for your domain and obtain Nameservers.
- Point your domain to the nameservers we just obtained by changing nameserver on godaddy.
Create a Hosted Zone in AWS Route 53
First of all log in to your AWS console and then search for Route 53 in the search bar or service list.

Once you are on Route 53 dashboard, click on Hosted Zone from the sidebar, it’ll take you to the list of Hosted zones, if you are new to this and never created one, list will remain empty until the end of this section of this tutorial.
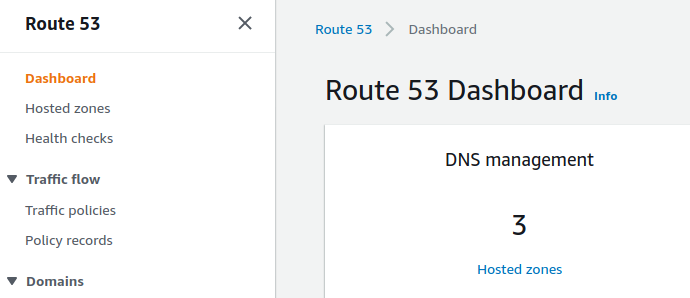
Click on Create Hosted Zone button available at top right end of the view.

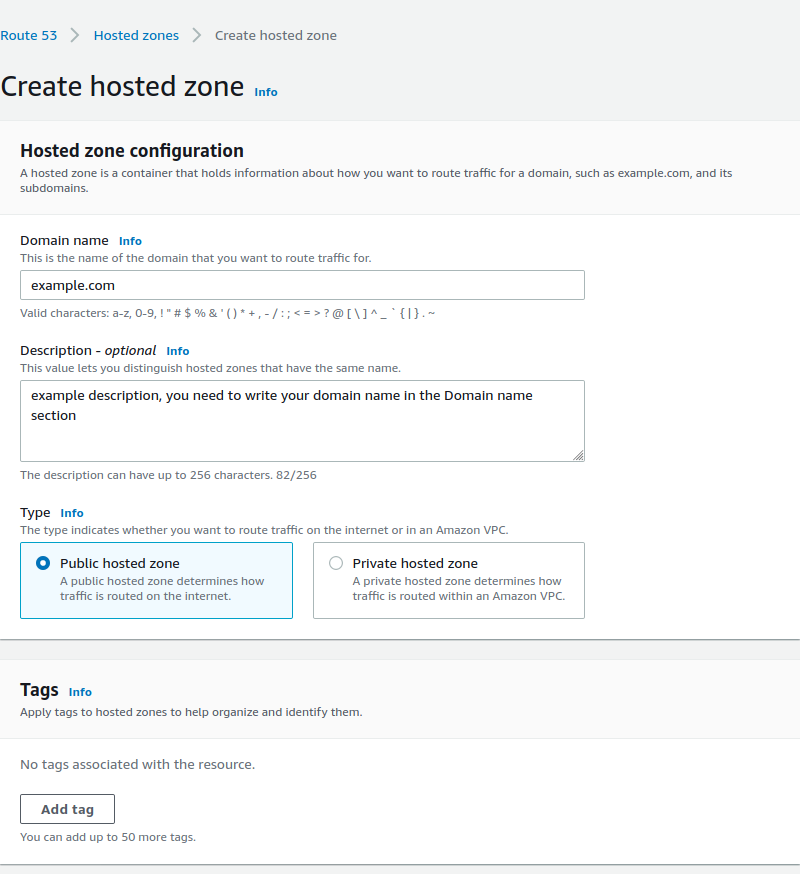
On the create hosted zone form, fill in the domain name you want to point, no need to put http or https at this moment, you can choose to leave description blank and leave the Type option to Public(which is selected by default).
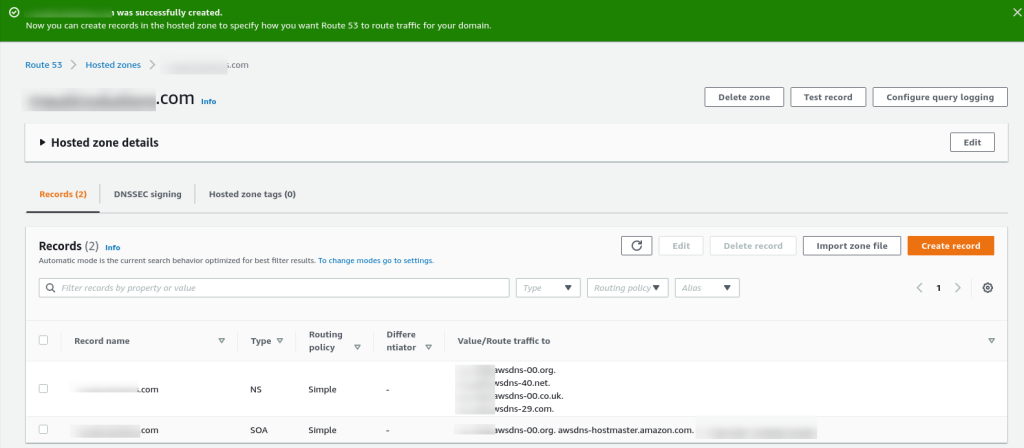
Save and submit the form, it’ll create hosted zone for you and shall take you to the list of DNS records created for you, by default it’ll create NS and SOA records for you. SOA is not important for the scope of this tutorial, but next to NS you should be able to find 4 Nameserver records, these are the records which we need to place in Godaddy Nameserver fields for your registered domain.
And you’re done for the AWS part for now. Your DNS records are ready and Nameservers are available.
Point Godaddy Domain to Route 53 Nameservers
Log in into your godaddy account. And navigate to My Products page. There you should be able to find All your domains under the section “All Products and Services”. Now there should be two options available, DNS and Manage in front of your selected domain. If DNS option is not available, not to worry, Just click Manage and you shall be fine.

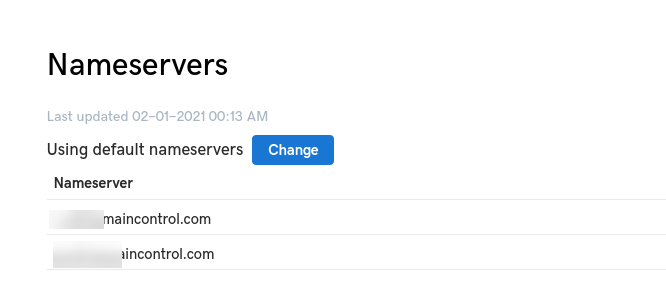
If DNS option is available, Great! if not, then go to Domain Manager and look for Manage DNS option on the page. In any case the goal is to reach DNS management section where the option to change Nameservers is available. Once you reach the DNS management page, find Nameserver Section where you can change the Nameservers to the URIs obtained from Hosted Zone in previous section of this tutorial.
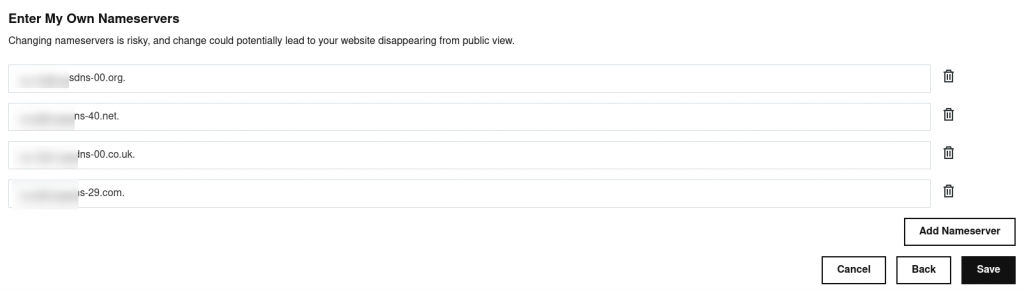
Godaddy will ask you to confirm the change of nameserver, just ignore the big CTA and click on the link at bottom, “Enter my own nameservers(Advance)”. This will take you to the form where you can add your nameserver URIs.
On the provided form by default there should be 2 fields however you can add another two fields by clicking “Add Nameserver” button at bottom right. Copy the nameservers from hosted zone to each field(one per field) and save the settings.
That’s it, We are good to go. Godaddy will give a popup asking for confirmation just mark the checkbox and confirm the dialogue. It’ll tell you that the setting may take some time to update, but Ideally it happens very fast, and you also get an email confirmation for the same.
TIP: If you are facing any issues in Saving the nameserver list, please try without the “.” at the end of each nameserver. Hosted Zone provides the NS list with “.”(period) at the end, in case godaddy doesn’t accept it, just remove the period and keep the URI. In my case it worked without the period at the end(however I took screenshot before removing it).
Pointing Route 53 to Amazon Lightsail Instance
Okay, you have successfully completed two steps, but you are still one step away from getting a good response from your server, All communication happen between client and server. Client is the browser and Host is the Server(A machine with IP address which returns response when a query is made).
If you already have an instance of ec2 or lightsail running, you can easily point this domain to the ip address of it. I prefer Lightsail instance thus in this example I’ll list the steps to connect lightsail instance only.
Assuming you already know how to create a lightsail instance I’ll list down the steps as follows:
- Create a lightsail instance as per your requirements.
- Once the Instance is up and running your will see it’s public IP.
- Use this IP to create A record in the hosted zone for your domain.

The problem with this approach is that the public IP of your Instance is not fixed thus everytime the IP changes you may need to edit the hosted zone and point it to the new IP address. To avoid this there is a simple solution. Create a Static IP and assign it to your instance.

To create the static IP is very easy:
- Go to Networking section in lightsail.
- Click Create Static IP.
- Choose your instance from the dropdown list.
- Give your Static IP a name(to identify in lightsail, in case of multiple static IPs).
- Save it to obtain your static IP.
Once you have a static IP it’ll be easy to use it in DNS record to point the domain to your lightsail instance.
As per Lightsail FAQ section, you can use upto 5 static IPs free of cost as long as you are using them, that means they must be attached to an Instance. If it is not attached to an instance they are charged at $0.005 USD/hour. That is still very cheap.
Cost of Static IP in Lightsail
Once you have static IP you just need to create an A record. To do so, click on Create Record button at the top right corner of the page, on your Hosted Zone detail page.
This will take you to the form, by default A record is selected(if you want to create another kind of record, for example MX record the procedure remains the same, just choose suitable value from dorpdown).
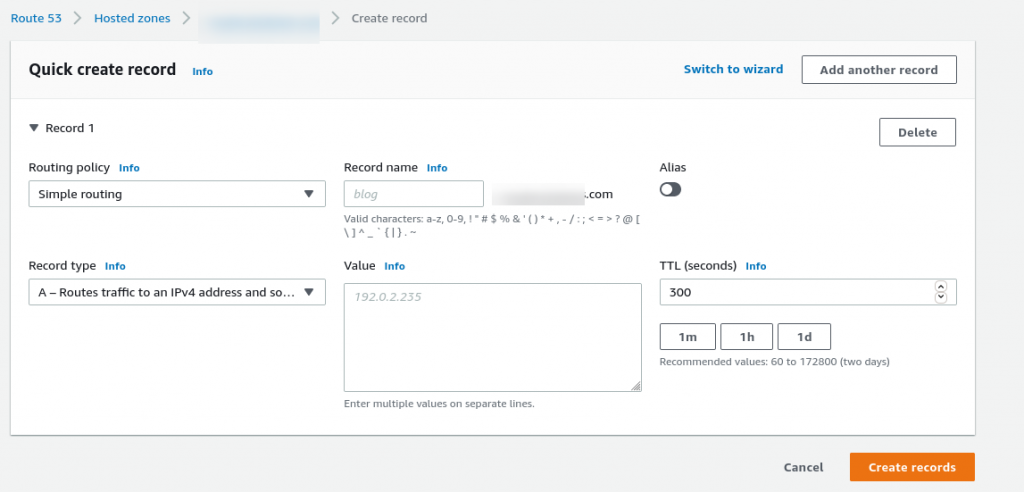
Leave the Record Name field blank, unless you want to create a subdomain. Place your IP address in the Value field and leave everything else as it is. Finally click Create records button to complete the process. Now your newly mapped domain is not only pointing to route 53 nameserver but also to a lightsail instance.
Pingback: purchase androxal uk how to get
Pingback: get enclomiphene generic canadian
Pingback: rifaximin low price
Pingback: how to order xifaxan generic vs brand name
Pingback: cheap staxyn american express canada
Pingback: buying avodart generic pharmacy canada
Pingback: sans ordonnance kamagra prescrire nato medicament
Pingback: discount flexeril cyclobenzaprine generic equivalent buy
Pingback: generic dutasteride canadian co no prescription
Pingback: cheapest buy gabapentin generic new zealand
Pingback: how to buy fildena uk pharmacy
Pingback: cheapest buy itraconazole buy from canada
Pingback: kamagra koupit