In this tutorial we will use bootstrap – a mobile first responsive css framework to convert a boring JSF page into an attractive looking form and table containing page. we will use simple page structure to convert an already created form and table into good looking page.
Tools Used: Eclipse JavaEE – Juno, Wildfly 8.1.0
This is a short tutorial in this we are going to convert a simple JSF page into a bootstrap based responsive page. We are going to use the page we created in Creating View in JSF+Managed Bean. Following is the Index of all the articles in the tutorial series.
Series Index:
- MySql Datasource creation in Wildfly 8
- Project structure Eclipse+Wildfly+MySql+JPA+EJB+JSF+RS
- Creating Entity using JPA+Hibernate
- Creating EJB to do CRUD on Entity
- Creating View in JSF+Managed Bean
- Applying Bootstrap to JSF based Web Application
- Template based View in JSF Web Application
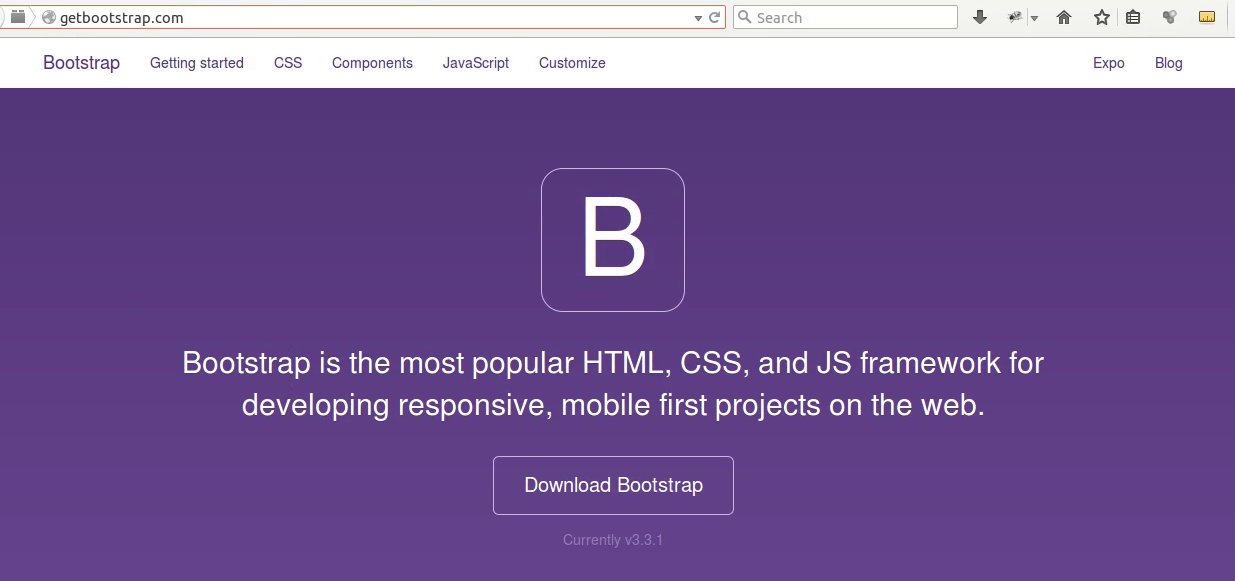
Bootstrap is a mobile first responsive design framework. It comes with many classes which not only helps to create a responsive website but also provide several classes that helps to create a good looking website there are several utility classes which reduces lot of designing effort. To know more about bootstrap and download it please visit official bootstrap website.
Currently Our page code looks like this.
<!DOCTYPE html PUBLIC "-//W3C//DTD XHTML 1.0 Transitional//EN" "http://www.w3.org/TR/xhtml1/DTD/xhtml1-transitional.dtd">
<html xmlns="http://www.w3.org/1999/xhtml"
      xmlns:h="http://java.sun.com/jsf/html"
      xmlns:f="http://java.sun.com/jsf/core"
      xmlns:ui="http://java.sun.com/jsf/facelets"
      xmlns:c="http://java.sun.com/jsp/jstl/core">

<h:head>Students</h:head>
<h:body>
	<h:form>
		<div>
			<h:outputLabel value="First Name" />
			<h:inputText value="#{studentMB.firstName}" />
		</div>
		<div>
			<h:outputLabel value="Last Name" />
			<h:inputText value="#{studentMB.lastName}" />
		</div>
		<div>
			<h:outputLabel value="Standerd" />
			<h:inputText value="#{studentMB.standerd}" />
		</div>
		<div>
			<c:choose>
				<c:when test="#{studentMB.id > 0}">
					<h:inputHidden value="#{studentMB.id}" />
					<h:commandButton action="#{studentMB.updateStudent()}" value="Update" />
				</c:when>
				<c:otherwise>
					<h:commandButton action="#{studentMB.createStudent()}" value="Create" />
				</c:otherwise>
			</c:choose>
		</div>
	</h:form>
	<table border="solid" cellpadding="2" cellspacing="3">
		<thead>
			<th>Name</th>
			<th>Standerd</th>
			<th></th>
			<th></th>
		</thead>
		<tbody>
			<ui:repeat var="stud" value="#{studentMB.getAllStudents()}">
				<tr>
					<td>#{stud.firstName} #{stud.lastName}</td>
					<td>#{stud.standerd}</td>
					<td>
						<h:form>
							<h:commandLink action="#{studentMB.getStudent(stud.id)}" value="Edit" />
						</h:form>
					</td>
					<td>
						<h:form>
							<h:commandLink action="#{studentMB.deleteStudent(stud.id)}" value="Delete" />
						</h:form>
					</td>
				</tr>
			</ui:repeat>
		</tbody>
	</table>
</h:body>
</html>
In this we need to add some meta information and then other stuff. Mainly we need to add meta charset, and viewport. Also to support bootstrap on IE we are applying meta http-equiv.
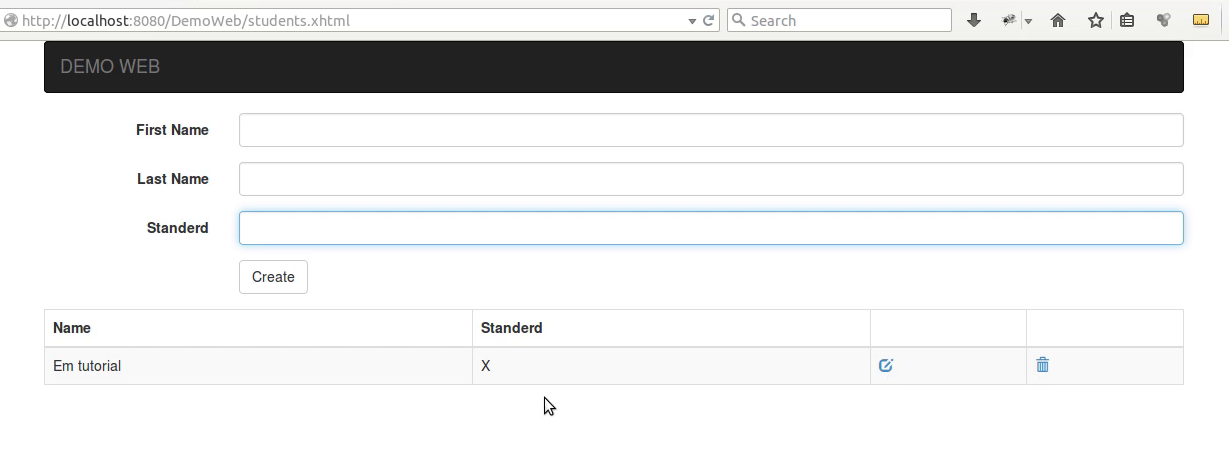
Bootstrap provide several classes but to make sure it all work. we need to put the code inside a main container div marked with class container. after that you can place various responsive utilities in side it. So we create a div and mark it with the class container. further we create another div with class navbar and sub div with class navbar-brand which acts as the container for the logo or title of your website.
Next we create a div with class row in it and another subdiv with class col-xs-12. This is a part of the structure of the bootstrap responsive hierarchy. To know more about this visit bootstrap css. On the same page you will find the structure of the form classes which we are going to transform our form into a good looking bootstrap form. We will use the form-horizontal class to create a responsive form and inside we will use the form-group, control-label and form-control classes. To give buttons a good look we are using btn and btn-default class. For tables we will use the table, table-bordered and table-striped class. Further we are using glyphicons which are shipped with the bootstrap distribution. you can know more about the bootstrap component and glyphicons on bootstrap component page.
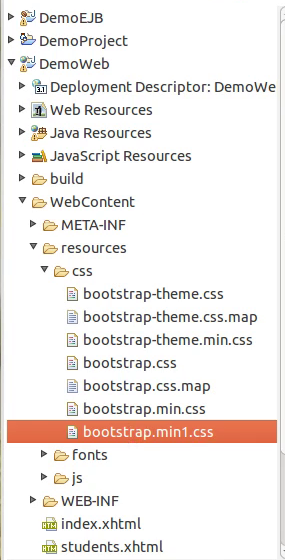
Before we start to code we are going to do some set up in our project structure. First create a directory named resources in web content directory. Now copy the css, fonts, js directory you get with bootstrap distribution in resources directory so that the bootstrap resources are available to our application. If you want you can use the CDN provided on bootstrap website instead of including files, but as we are going to use the files we need to make a little change to the bootstrap.min.css so that the fonts are available to css file, this is a little hack which you shall use in case you want to use the glyphicons or the icons will bot display on the page.
In the bootstrap.min.css file we have changes the reference to the font files from relative path to absolute path of our application. for example we changed
url(../fonts/)
to
url(/DemoWeb/resources/fonts/)
This will make sure the font files are available no matter how the css in included in the web page. We are using the h:outputStylesheet tag of JSF to include the style sheet as you can see in the code below. This is good way to include the stylesheet or script(h:outputScript) in the JSF page. Now the complete code looks like this.
<!DOCTYPE html PUBLIC "-//W3C//DTD XHTML 1.0 Transitional//EN" "http://www.w3.org/TR/xhtml1/DTD/xhtml1-transitional.dtd">
<html xmlns="http://www.w3.org/1999/xhtml"
      xmlns:h="http://java.sun.com/jsf/html"
      xmlns:f="http://java.sun.com/jsf/core"
      xmlns:ui="http://java.sun.com/jsf/facelets">
<h:head>
	<meta charset="utf-8" />
	<meta name="viewport" content="width=device-width, initial-scale=1" />
	<meta http-equiv="X-UA-Conpatible" content="IE=edge" />
	<h:outputStylesheet library="css" name="bootstrap.min.css"></h:outputStylesheet>
	<title>Demo Web</title>
</h:head>
<h:body>
	<div class="container">
		<div class="navbar navbar-inverse">
			<div class="navbar-brand">
				DEMO WEB
			</div>
		</div>
		<div class="row">
			<div class="col-xs-12">
				<h:form styleClass="form-horizontal">
					<div class="form-group">
						<h:outputLabel value="First Name" styleClass="control-label col-sm-2"/>
						<div class="col-sm-10">
							<h:inputText value="#{studentMB.firstName}" styleClass="form-control"/>
						</div>
					</div>
					<div class="form-group">
						<h:outputLabel value="Last Name" styleClass="control-label col-sm-2"/>
						<div class="col-sm-10">
							<h:inputText value="#{studentMB.lastName}" styleClass="form-control"/>
						</div>
					</div>
					<div class="form-group">
						<h:outputLabel value="Standerd" styleClass="control-label col-sm-2"/>
						<div class="col-sm-10">
							<h:inputText value="#{studentMB.standerd}" styleClass="form-control"/>
						</div>
					</div>
					<div class="form-group">
						<div class="col-sm-offset-2 col-sm-10">
							<c:choose>
								<c:when test="#{studentMB.id > 0 }">
									<h:inputHidden value="#{studentMB.id}" />
									<h:commandButton action="#{studentMB.updateStudent()}" value="Update" styleClass="btn btn-default"/>
								</c:when>
									<c:otherwise>
									<h:commandButton action="#{studentMB.createStudent()}" value="Create" styleClass="btn btn-default"/>
								</c:otherwise>
							</c:choose>
						</div>
					</div>
				</h:form>
				<table class="table table-bordered table-striped">
					<thead>
						<tr>
							<th>Name</th>
							<th>Standerd</th>
							<th></th>
							<th></th>
						</tr>
					</thead>
					<tbody>
						<ui:repeat var="stud" value="#{studentMB.getAllStudents()}">
							<tr>
								<td>#{stud.firstName} #{stud.lastName}</td>
								<td>#{stud.standerd}</td>
								<td>
									<h:form>
										<h:commandLink action="#{studentMB.getStudent(stud.id)}" >
											<i class="glyphicon glyphicon-edit"></i>
										</h:commandLink>
									</h:form>
								</td>
								<td>
									<h:form>
										<h:commandLink action="#{studentMB.deleteStudent(stud.id)}">
											<i class="glyphicon glyphicon-trash"></i>
										</h:commandLink>
									</h:form>
								</td>
							</tr>
						</ui:repeat>
					</tbody>
				</table>
			</div>
		</div>
	</div>
</h:body>
</html>
Pingback: buying androxal cost on prescription
Pingback: how to order enclomiphene generic version
Pingback: purchase rifaximin usa seller
Pingback: discount xifaxan singapore where to buy
Pingback: get staxyn generic good
Pingback: generic avodart over the counter usa
Pingback: is dutasteride over the counter in Australia
Pingback: discount flexeril cyclobenzaprine generic in canada
Pingback: cheap gabapentin buy online australia
Pingback: get fildena no prescription online
Pingback: kanadská sleva kamagra
Pingback: où pouvez-vous obtenir kamagra sans ordonnance
Pingback: how many orgasms can u get on 1 itraconazole pill