In this tutorial we are covering crud operation from a JSF view backed by managed bean. First we Create JSF view backed by ManagedBean, we show the use of ui:repeat and h:form in jsf view, the use of c:choose, when-otherwise in conditions in JSF. CRUD operations with JSF and much more.
Tools Used: Eclipse JavaEE – Juno, Wildfly 8.1.0
In this tutorial we are going to create a view for the CRUD operations on Student Entity we created in Creating Entity using JPA+Hibernate. We have already created EJB for CRUD operations, in EJB with Local Interface Implementation. Now we are going to create a Managed Bean(we have already created a MangedBean, we will extend the same), and an XHTML page.
Series Index:
- MySql Datasource creation in Wildfly 8
- Project structure Eclipse+Wildfly+MySql+JPA+EJB+JSF+RS
- Creating Entity using JPA+Hibernate
- Creating EJB to do CRUD on Entity
- Creating View in JSF+Managed Bean
- Applying Bootstrap to JSF based Web Application
- Template based View in JSF Web Application
To start we are going to create a class called StudentMB, and mark it with @ManagedBean annotation to make it a managed bean, and also we are going to mark it @ViewScoped this will make this bean scope to the view presentation. Now we need to define some fields and their getter setters. At last we need to define the methods which will do the Object creation and EJB method invocation.
Note: There are three scopes in managed beans viz session scope, request scope and view scope. These scope have different meanings as Session scope is valid for the whole session until you close the window. Request scope is valid only until a response is received for the request. View scope is valid until a view exist or is not closed.
package com.em.managedbeans;

import java.util.List;

import javax.ejb.EJB;
import javax.faces.bean.ManagedBean;
import javax.faces.bean.ViewScoped;

import com.em.ejb.beans.interfaces.StudentDAOLocal;
import com.em.jpa.entity.Student;

@ViewScoped
@ManagedBean
public class StudentMB {

	@EJB
	private StudentDAOLocal studentDAOLocal;

	private int id;
	private String firstName;
	private String lastName;
	private String standerd;

	public StudentMB() {
	}

	public void createStudent(){
		Student student = new Student();
		student.setFirstName("TutorialsJointRemote");
		student.setLastName("TutorialsRemote");
		student.setStanderd("X");
		studentDAOLocal.create(student);
	}

	public void updateStudent(){
		Student student = new Student();
		student.setId(id);
		student.setFirstName(firstName);
		student.setLastName(lastName);
		student.setStanderd(standerd);
		studentDAOLocal.update(student);
	}

	public void getStudent(int id){
		Student student = studentDAOLocal.getStudent(id);
		this.id = student.getId();
		firstName = student.getFirstName();
		lastName = student.getLastName();
		standerd = student.getStanderd();
	}

	public void deleteStudent(int id){
		studentDAOLocal.remove(id);
	}

	public List<Student> getAllStudents(){
		return studentDAOLocal.getAllStudents();

	}
	public int getId() {
		return id;
	}

	public void setId(int id) {
		this.id = id;
	}

	public String getFirstName() {
		return firstName;
	}

	public void setFirstName(String firstName) {
		this.firstName = firstName;
	}

	public String getLastName() {
		return lastName;
	}

	public void setLastName(String lastName) {
		this.lastName = lastName;
	}

	public String getStanderd() {
		return standerd;
	}

	public void setStanderd(String standerd) {
		this.standerd = standerd;
	}

}
In this class we have created four fields corresponding to four fields of the Student entity. then we have created 5 methods which corresponds to the 5 methods of the StudentDAO EJB we created in the previous section of this tutorial series(EJB Implementation using Local Interface). createStudent() creates a student object from the values from the form we are going to create on XHTML page and pass it on to the create() method of the EJB. similarly the updateStudent() object work to call update() method of EJB. getStudent() populate the form when we want to edit an already existing Student record, and Delete will invoke the remove method of the EJB. At last we create the the getAllStudent() method which help us to retrieve all the values from database to create a table on the XHTML page.
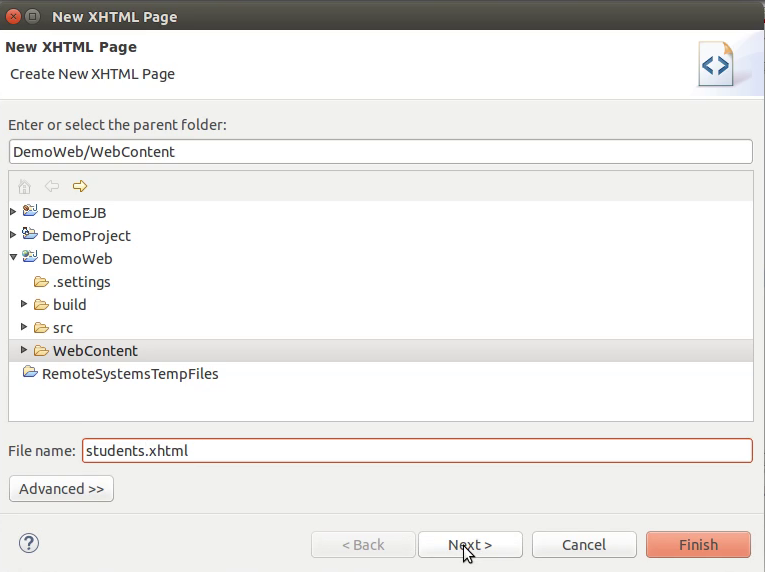
Next we are going to create an XHTML page which will use this Managed bean to let user operate on the student entity. For this we are creating an XHTML page by the name Student.xhtml. We will start by creating a blank xhtml template and add standard core library to the xml name space.
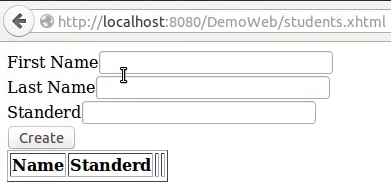
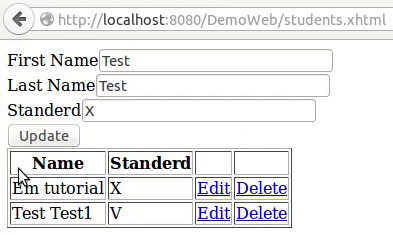
We have created the xhtml page and a form. In form there are three fields which corresponds to the fields of the JPA entity of the Student(Creating Entity using JPA+Hibernate). Next we have used the choose tags from the core library of JSTL to determine if this is new entry creation or current entry update. So we check if there is an already existing Id then display update button which on click invoke the updateStudent() entity. On the other end if this is new entry then invoke createStudent() on button click.
Next we create a table with the four fields one each for Name, standard, Edit and Delete options. In the table body we have used ui:repeat tag from the facelets library of JSF. For the repetition we obtain the list values from the method getAllStudents and temporary storing them in var field attribute we create a table. Please note that we are using getStudent() method to perform the form filling in case of entry update.
<!DOCTYPE html PUBLIC "-//W3C//DTD XHTML 1.0 Transitional//EN" "http://www.w3.org/TR/xhtml1/DTD/xhtml1-transitional.dtd">
<html xmlns="http://www.w3.org/1999/xhtml"
      xmlns:h="http://java.sun.com/jsf/html"
      xmlns:f="http://java.sun.com/jsf/core"
      xmlns:ui="http://java.sun.com/jsf/facelets"
      xmlns:c="http://java.sun.com/jsp/jstl/core">

<h:head>Students</h:head>
<h:body>
	<h:form>
		<div>
			<h:outputLabel value="First Name" />
			<h:inputText value="#{studentMB.firstName}" />
		</div>
		<div>
			<h:outputLabel value="Last Name" />
			<h:inputText value="#{studentMB.lastName}" />
		</div>
		<div>
			<h:outputLabel value="Standerd" />
			<h:inputText value="#{studentMB.standerd}" />
		</div>
		<div>
			<c:choose>
				<c:when test="#{studentMB.id > 0}">
					<h:inputHidden value="#{studentMB.id}" />
					<h:commandButton action="#{studentMB.updateStudent()}" value="Update" />
				</c:when>
				<c:otherwise>
					<h:commandButton action="#{studentMB.createStudent()}" value="Create" />
				</c:otherwise>
			</c:choose>
		</div>
	</h:form>
	<table border="solid" cellpadding="2" cellspacing="3">
		<thead>
			<th>Name</th>
			<th>Standerd</th>
			<th></th>
			<th></th>
		</thead>
		<tbody>
			<ui:repeat var="stud" value="#{studentMB.getAllStudents()}">
				<tr>
					<td>#{stud.firstName} #{stud.lastName}</td>
					<td>#{stud.standerd}</td>
					<td>
						<h:form>
							<h:commandLink action="#{studentMB.getStudent(stud.id)}" value="Edit" />
						</h:form>
					</td>
					<td>
						<h:form>
							<h:commandLink action="#{studentMB.deleteStudent(stud.id)}" value="Delete" />
						</h:form>
					</td>
				</tr>
			</ui:repeat>
		</tbody>
	</table>
</h:body>
</html>
We are all set for the deployment and performing the CRUD operations on student entity.

In the next part of the tutorial we will create apply the bootstrap to this view to give it a good look.
Pingback: purchase androxal without a script
Pingback: order enclomiphene canada price
Pingback: cheap rifaximin australia generic online
Pingback: get xifaxan purchase no prescription
Pingback: purchase staxyn purchase to canada
Pingback: buying avodart cheap usa
Pingback: how to buy dutasteride purchase discount
Pingback: online order flexeril cyclobenzaprine purchase online canada
Pingback: order gabapentin purchase discount
Pingback: order fildena cheap from canada
Pingback: discount itraconazole generic does it work
Pingback: ne obecný kamagra bez lékařského předpisu
Pingback: medicament kamagra achat