In the previous part I have described how to create mautic plugin directory structure. In this tutorial I am moving on to create an MVC and Side menu entry in order to create a Controller and View. Overall this tutorial covers following:
- Adding icon to the plugin (visible in plugin section).
- Creating Side menu entry in Mautic.
- Creating Controller and View in Mautic for private or after login page.
- Creating a Controller and View in Mautic for public page.
Let’s dive into the tutorial and see how to accomplish all four parts step by step.
Adding Icon to Mautic Plugin
However this should be part of Plugin Integration tutorial but I decide to include it in this tutorial because one might be curios looking into plugin view, that other plugins have their own icons but this plugin doesn’t. So here it goes.
First of all create an icon of size 128px X 128px and png format. then create directory structure in plugin root, that is MauticDemoBundle > Assets > img. And place the file in it.
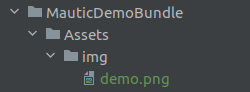
The name of your icon file should be all small letters and matching with the Integration class name(we’ll create in next step).
create an empty Integration class with just two default methods implemented from the AbstractIntegration class. The directory structure will be like this:
MauticDemoBundle
- Integration
- - DemoIntegration.php

The code in your file will be simple for the moment because purpose of it is to display icon and not actually do the integration(at this stage).
<?php
namespace MauticPlugin\MauticDemoBundle\Integration;

use Mautic\PluginBundle\Integration\AbstractIntegration;

class DemoIntegration extends AbstractIntegration
{
    public function getName()
    {
        return "Demo";
    }

    public function getAuthenticationType()
    {
        return "none";
    }
}
Finally Register the Integration in the config.php file as a service.
<?php
return [
    'name' => 'Mautic Demo Plugin',
    /*other configs here*/
    'services' => [
        'integrations' => [
            'mautic.integration.demo' => [
                'class'=>\MauticPlugin\MauticDemoBundle\Integration\DemoIntegration::class,
                'arguments' => [
                    'event_dispatcher',
                    'mautic.helper.cache_storage',
                    'doctrine.orm.entity_manager',
                    'session',
                    'request_stack',
                    'router',
                    'translator',
                    'logger',
                    'mautic.helper.encryption',
                    'mautic.lead.model.lead',
                    'mautic.lead.model.company',
                    'mautic.helper.paths',
                    'mautic.core.model.notification',
                    'mautic.lead.model.field',
                    'mautic.plugin.model.integration_entity',
                    'mautic.lead.model.dnc',
                ]
            ]
        ]
    ]
];
Before mautic 3 you didn’t need to pass all these arguments in the integration service configuration, since 3.x this is required, easiest way to do so is to copy them from another existing plugin config.
helping Note
Just clear the cache and you should be able to see your Icon in the plugin section.
Anyone would expect it to be a one step process but it takes little more than that. The reason for that is, that plugins listed in the plugin sections are mostly Integration based plugins and helps connect other applications with Mautic. Thus Mautic Plugins listed there are representing other applications thus Icon also represent other applications.
Okay Let’s move on to our next part, Adding Sidemenu entry. This is easy like real easy, let’s see.
Add menu in Sidebar from Mautic plugin
So here’s a default sidebar looks like in Mautic:
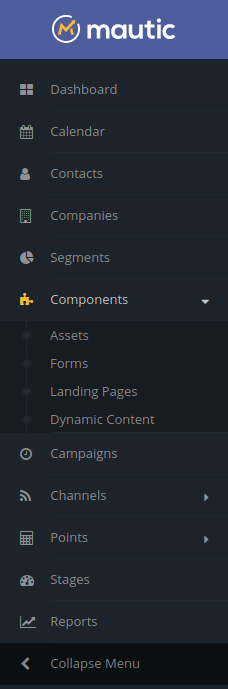
Target of this section of tutorial is to add a custom entry in the sidebar from the plugin which is being developed. To accomplish so an entry needs to be added in the confgi.php file.
<?php
return [
    'name' => 'Mautic Demo Plugin',
    /*other entries here*/
    'menu' => [
        'main' => [
            'items' => [
                'mautic.demo.menu.demo' => [
                    'id' => 'demo_menu',
                    'iconClass' => 'fa-check'
                ]
            ]
        ]
    ],
    'services' => [
      /*service configs here*/
    ]
Okay, so let me describe what this code block is doing here.
- I added a new associative array in the config with key
menu. - This tells Mautic to add a menu item from this plugin.
- There can be 4 kinds of menu(based on placement), namely
main,admin,profileandextra. - This code block adds an entry in the
mainmenu. - There’s no limit on how many number of menu item you can add, however in this tutorial I have added just 1.
- A menu item is identified with a unique key which also acts as translation key(read on to know more).
- Each Item have have multiple configuration options, in this one I have demonstrated very basic two.
- An Id which should be unique on the page, and an Icon class, this comes from font-awesome.
- So this adds a menu in sidebar that looks like the screenshot below.
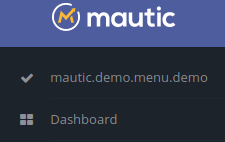
As you can see the check icon is there and the string is there is the key of associative array from the configuration. Now ideally nobody wants to show it like this but this is an opportunity to make it translatable. I’ll describe next how to create translation file and make it proper human readable or understandable text.
Localization of Mautic plugin
To localize the plugin Mautic uses .ini files. These files are placed in the directory named by language code like en_US for English. So let’s move on and create a directory structure like below:
MauticDemoBundle
- Translations
- - en_US
- - - messages.ini
In messages.ini the translations message are place one per like and in key="value" format.
#messages.ini
mautic.demo.menu.demo="Demo Menu"
Yes as simple as this. So clear the cache and check the side menu again.
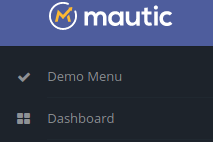
So as you see, if you want to translate for more languages, just create a directory in Translations directory and a message.ini file in it. For example de_DE directory and just similarly copy the message.ini file in there then translate the values.
It is important to know about translations because this will come handy in many cases like Forms and Integrations etc. Read more about Translations in Mautic here.
Creating Model View and Controller
According to official documentation MVC in Mautic plugin is described here. However this documentation is outdated as of now. Since Mautic 3.x the symfony version is upgraded as well, so instead of creating Models like described in the documentation you can create a service class in use Dependency Injection in the controller to use it. I will describe mainly use of Controller and View and also how to connect this with the Menu created in previous section.
To create and register a controller we need to register a route in the config of the plugin.
<?php
return [
    'name' => 'Mautic Demo Plugin',
    /*other description configurations like description, author, version etc*/
    'routes' => [
        'main' => [
            'mautic.demo.demo_secured' => [
                'path' => 'demo_secured',
                'controller' => 'MauticDemoBundle:Demo:index'
            ]
        ],
        'public' => [
            'mautic.demo.demo_public' => [
                'path' => 'demo_public',
                'controller' => 'MauticDemoBundle:Demo:publicIndex'
            ]
        ]
    ],
    'menu' => [
        'main' => [
            'items' => [
                'mautic.demo.menu.demo' => [
                    'id' => 'demo_menu',
                    'iconClass' => 'fa-check',
                    'route' => 'mautic.demo.demo_secured'
                ]
            ]
        ]
    ],
    /*other configurations like services and so on*/
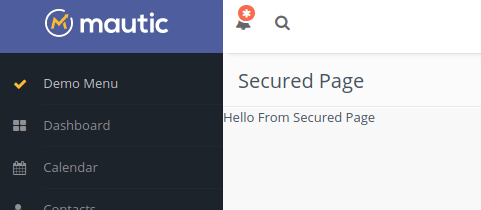
In the configuration above you may notice two kind of routes, main and public. Also I added a route in the Menu which was created in previous section. Here, main defines the route which comes under the secured(or after login) area and public can be accessed by anyone. I have used the secured route as the route of the menu item. When we click on the menu item it’ll load the view provided by DemoController and will load indexAction.
The controller and views are defined in a directory structure show below:
MauticDemoBundle
- Controller
- - DemoController.php
- Views
- - Demo
- - - index.html.php
- - - public_index.html.php
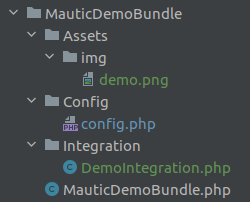
So the final directory and file structure looks like this;
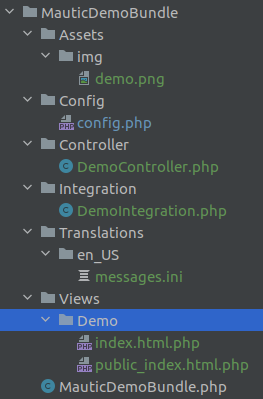
The Controller is placed in Controller directory, views are placed in Views directory further categorized by sub directories depending on which controller the view belongs to. The Controller and views structure is defined as follows:
<?php
namespace MauticPlugin\MauticDemoBundle\Controller;

use Mautic\CoreBundle\Controller\CommonController;

class DemoController extends CommonController
{
    public function indexAction(){
        return $this->delegateView(
            [
                'contentTemplate' => 'MauticDemoBundle:Demo:index.html.php',
                'viewParameters' => [
                    'heading' => 'Secured Page',
                    'body' => 'Hello From Secured Page'
                ]
            ]
        );
    }

    public function publicIndexAction(){
        return $this->delegateView(
            [
                'contentTemplate' => 'MauticDemoBundle:Demo:public_index.html.php',
                'viewParameters' => [
                    'heading' => 'Public Page',
                    'body' => 'Hello from Public Page'
                ]
            ]
        );
    }
}
The controller lists the actions which triggers on a certain point, like when a route is invoked. the format of the function is appended by Action keyword for example in above code it is written as indexAction and publicIndexAction this syntax is kept from older versions of the Mautic. And the view invocation is done using a method provided by CommonController class.
In the delegateView takes an array as parameter in which I have passed contentTemplate which is path to the view file and then another array with key viewParameters which takes an associative array and makes it available in the view template. The keys become variables in the view, so you can use them as you like.
<?php
/*
MauticDemoBundle/Views/Demo/index.html.php
*/
$view->extend("MauticCoreBundle:Default:content.html.php");
$view['slots']->set('headerTitle', $heading);
echo $body;
?>
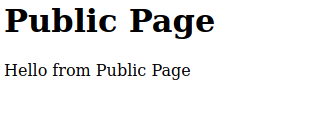
/*
MauticDemoBundle/Views/Demo/public_index.html.php
*/
<h1><?php echo $heading; ?></h1>
<p><?php echo $body; ?></p>
Well, in the two views please note the difference of extending template. Because one is secured and will be called inside security layer of mautic it can extend the base template which is provided for displaying content. However in the public view we don’t have access to template, if I try to do so I get error, thus I can safely say this base template is not available outside secure layer.
MauticCoreBundle:Default:content.html.php is the base template provided by Mautic’s core bundle and provides some basic blocks and can be extended just like we do with any symfony template.
Mautic is already using twig templates when it comes to themes(landing pages, emails, forms etc) but for plugins still php templates are being used. I expect soon we will have full support of twig in the plugins as well.
my thoughts and expectations
This is quite basic and if you clear the cache, refresh the view and click the menu it should take you to the secured view which is called by indexAction and url in browser should be like /s/demo_secured like defined in the routes in config. Similarly in for the public view the url will not have /s/ but can be called directly by https://yoururl.dom/demo_public the screenshot of both are displayed below.
The whole code for this tutorial can be accessed at https://github.com/mayanktiwaridotcom/MauticDemoBundle/tree/tutorial2mvc.
This is the second of the series, in the next one I will demonstrate:
- How to create Database table for your plugin.
- How to create Form and create crud.
for complete documentation of Mautic plugin development please check out official developer documentation. In this tutorial I have only tried to simplify it to the level where any beginner can understand it. for any queries or question please do comment or use Contact page.
Pingback: buying enclomiphene without prescriptions canada
Pingback: acheter kamagra
Pingback: get free sample of androxal
Pingback: cheap dutasteride usa drugstore
Pingback: flexeril cyclobenzaprine comprar peru
Pingback: buy cheap gabapentin purchase online safely
Pingback: cheap fildena cheap uk buy purchase
Pingback: No perscription required itraconazole
Pingback: buy cheap staxyn without prescription
Pingback: order avodart canada fast shipping
Pingback: best prices on generic rifaximin
Pingback: buy cheap xifaxan generic is it safe
Pingback: nejlevnější obecný kamagra uk