This is first part of tutorial series of advance java application. In this part we will discribe the process for creating mysql datasource in wildfly 8 to work with javaee7 application, this is step by step tutorial to show how to work out the wildfly datasource, we will use this datasouce in further part of this demo application.
Tutorial Level: Intermediate | Advance
Tools Used: Wildfly 8.1.0, MySql-5.x.x, mysql-connector-5.1.33.jar
With this tutorial we are going to start a series of tutorials to demonstrate how to create an Enterprise Web Application in Java. So Overall we are going to create a small web application in JavaEE7. Throughout the application we will proceed in such a way that all these are independent steps so that you can choose which to study and which to skip. Following is the Index we have prepared for the whole series.
In this application we assume that a small school based application is required which has a Database named “School”. For which all the other work will be done using the Application, Our focus will be to create an automated process and to reduce the Manual configuration.
Series Index:
- MySql Datasource creation in Wildfly 8
- Project structure Eclipse+Wildfly+MySql+JPA+EJB+JSF+RS
- Creating Entity using JPA+Hibernate
- Creating EJB to do CRUD on Entity
- Creating View in JSF+Managed Bean
- Applying Bootstrap to JSF based Web Application
- Template based View in JSF Web Application
So her we start now with first part of our series.
Creating MySql datasource in Wildfly 8
MySql is a well known DBMS software available on the open source and widely used. When I was first working to use mysql with wildfly, it was difficult to find a proper and straight forward tutorial(most of them used glassfish instead of wildfly). So we are presenting this in step by step order.
The steps to follow are as follows:
Log in into the administrative console of the wildfly, it is usually available at port 9990 of your wildfly domain. Most commonly http://localhost:9990
After logging in we need to go to Configuration > Connector > Datasources
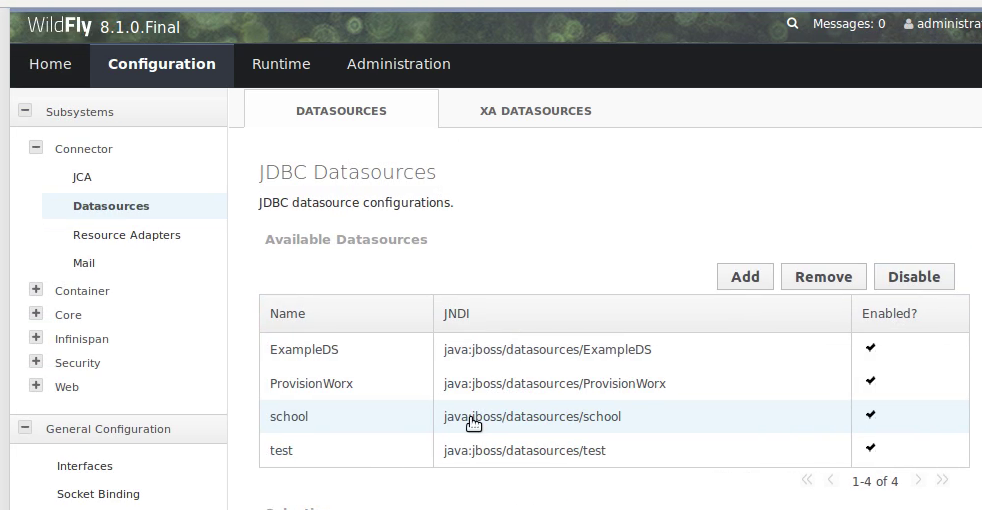
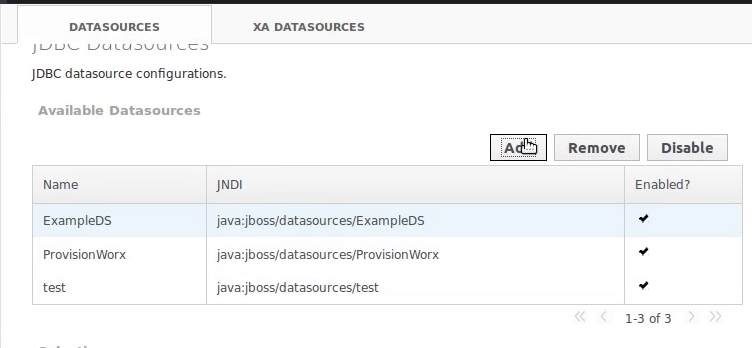
Here you can see the list of default or already created datasources, Now we need to create a new Datasource so we click the “Add” button which will present us with a 3 step wizard to create the datasource.
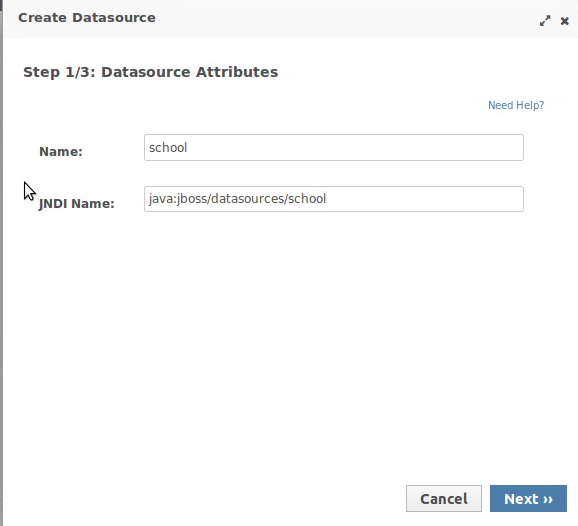
In the first step the name of datasource and JNDI Name is needed to be specified which we are specifying as follows
Name:school
JNDI Name:java:jboss/datasources/school
Note: we are assuming that we are creating application on the basis of school database.
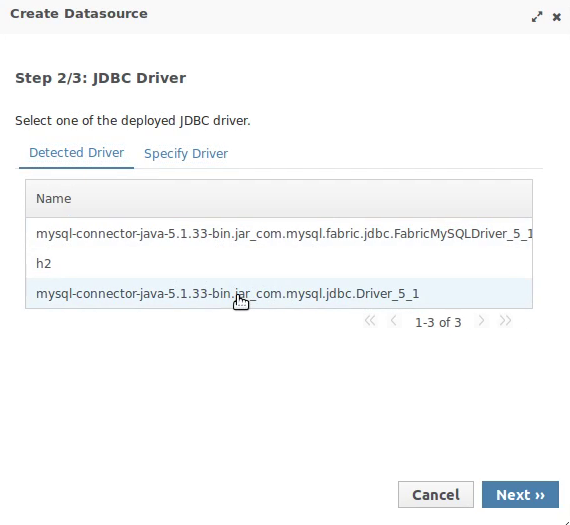
Next part we choose a driver for the jdbc connection and operation, in our case we use mysql connector. If you don’t have already specified mysql connector detected by the wizard you can specify your own driver in this part.
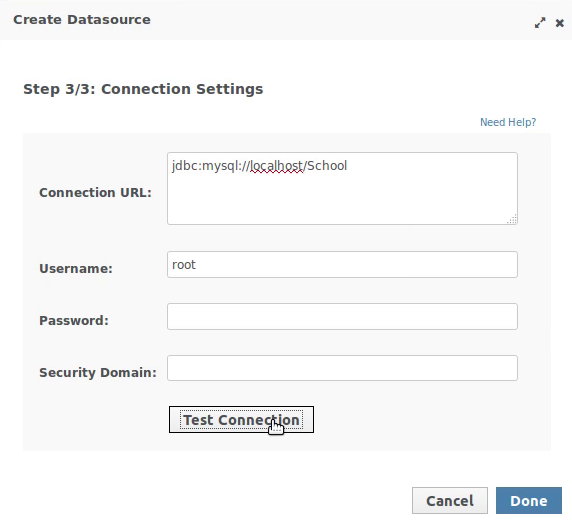
To finalize the process we need to provide the connection settings, with the connection URL and security information. In our app we are specifying it as:
Connection URL: jdbc:mysql://localhost/School
Username: root
Password:
Where URL is the jdbc url used by the driver, every vendor specifies its own stricture of the connection url, which is append with the mysql host domain and database name. and Username, Password is the information related to Database.
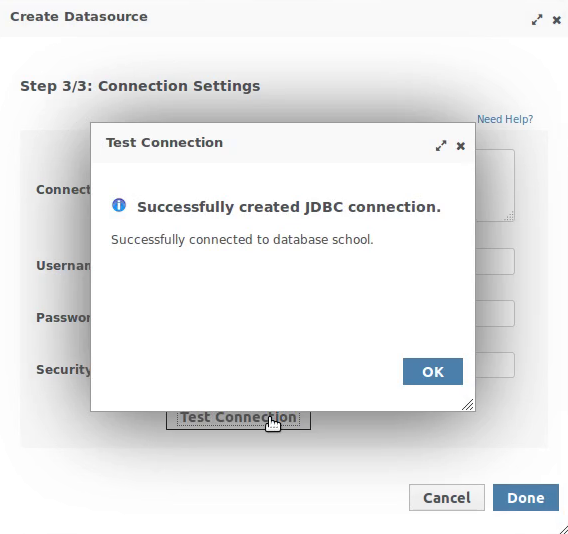
Once you specify the connection information you can click the “Test Connection” button which reflects the validity of the connection to database.
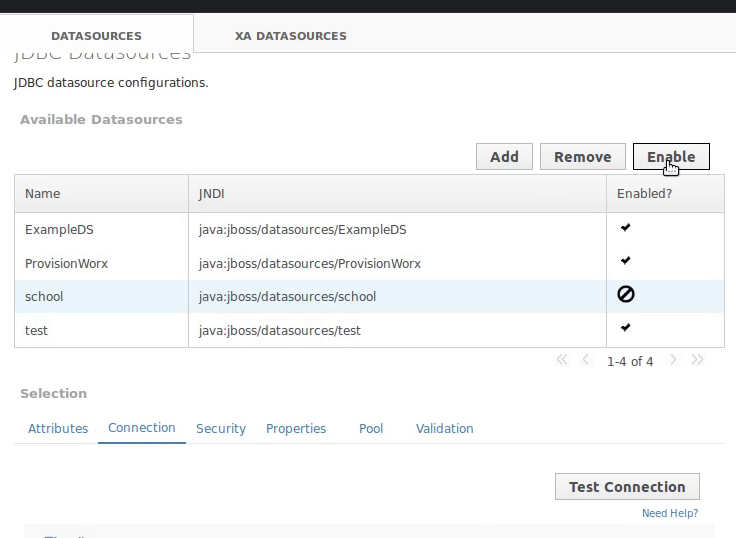
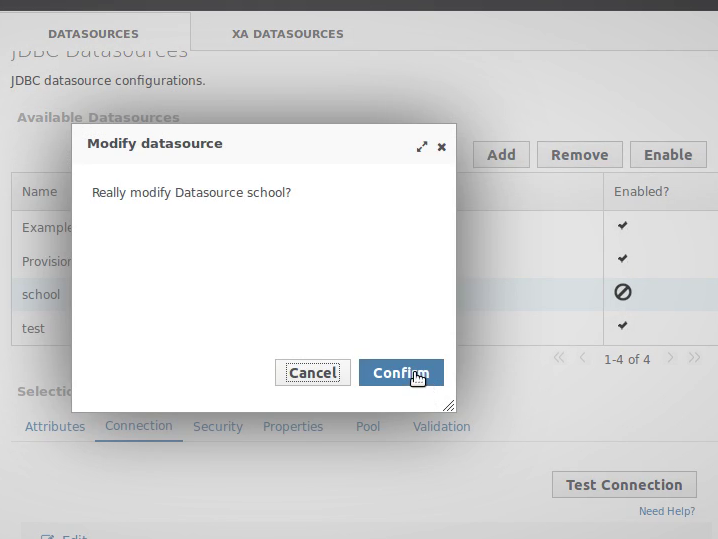
After the completion of wizard the datasource will be listed in the datasources panel, and finally you need to Enable the datasource.
This is all for the datasource, you can now use this datasource in your application.
Pingback: enclomiphene without a perscription or membership
Pingback: kamagra sans persription
Pingback: androxal fedex cod
Pingback: how to buy flexeril cyclobenzaprine cheap with prescription
Pingback: order dutasteride generic real
Pingback: buy gabapentin new zealand buy online
Pingback: online order fildena cheap alternatives
Pingback: purchase itraconazole france where to buy
Pingback: get staxyn generic name
Pingback: is avodart over the counter in Australia
Pingback: purchase rifaximin australia no prescription
Pingback: buying xifaxan australia generic online
Pingback: kamagra nízká cena